Onboarding guide
Set up Nordsynk for your accounting firm
This guide takes you from a personal invitation to a working Claude connection across multiple Fortnox companies. Allow about 20 minutes when your Fortnox users and permissions are ready.
You are done when every consultant can sign in to Nordsynk, sees the right client companies, and can ask Claude to work in an explicitly selected company.
Prepare before you start
- Open the invitation with the same email address named in the offer.
- Use a real personal Fortnox user for every consultant—not an integration user.
- Confirm that the user can access the right client companies and has the Fortnox products and permissions required by the workflows.
- Have Claude Desktop or Claude on the web available for the final section.
Open the invitation and verify the offer
- 1.1Open the personal activation link from Nordsynk. Check the workspace name, free-pilot or paid status, included users and companies, and the price that would apply after conversion.
- 1.2Sign in to Nordsynk with the email in the invitation. Sign-in is passwordless: a one-time link is emailed to you and remains valid for 15 minutes.
- 1.3A free pilot never starts charging automatically. Moving to paid access requires your explicit approval and, when applicable, Stripe Checkout.
Two separate permission layers
The Nordsynk invitation grants workspace access. Fortnox is connected separately, and Nordsynk can never expand a user's Fortnox permissions.
Connect the first Fortnox company and your clients
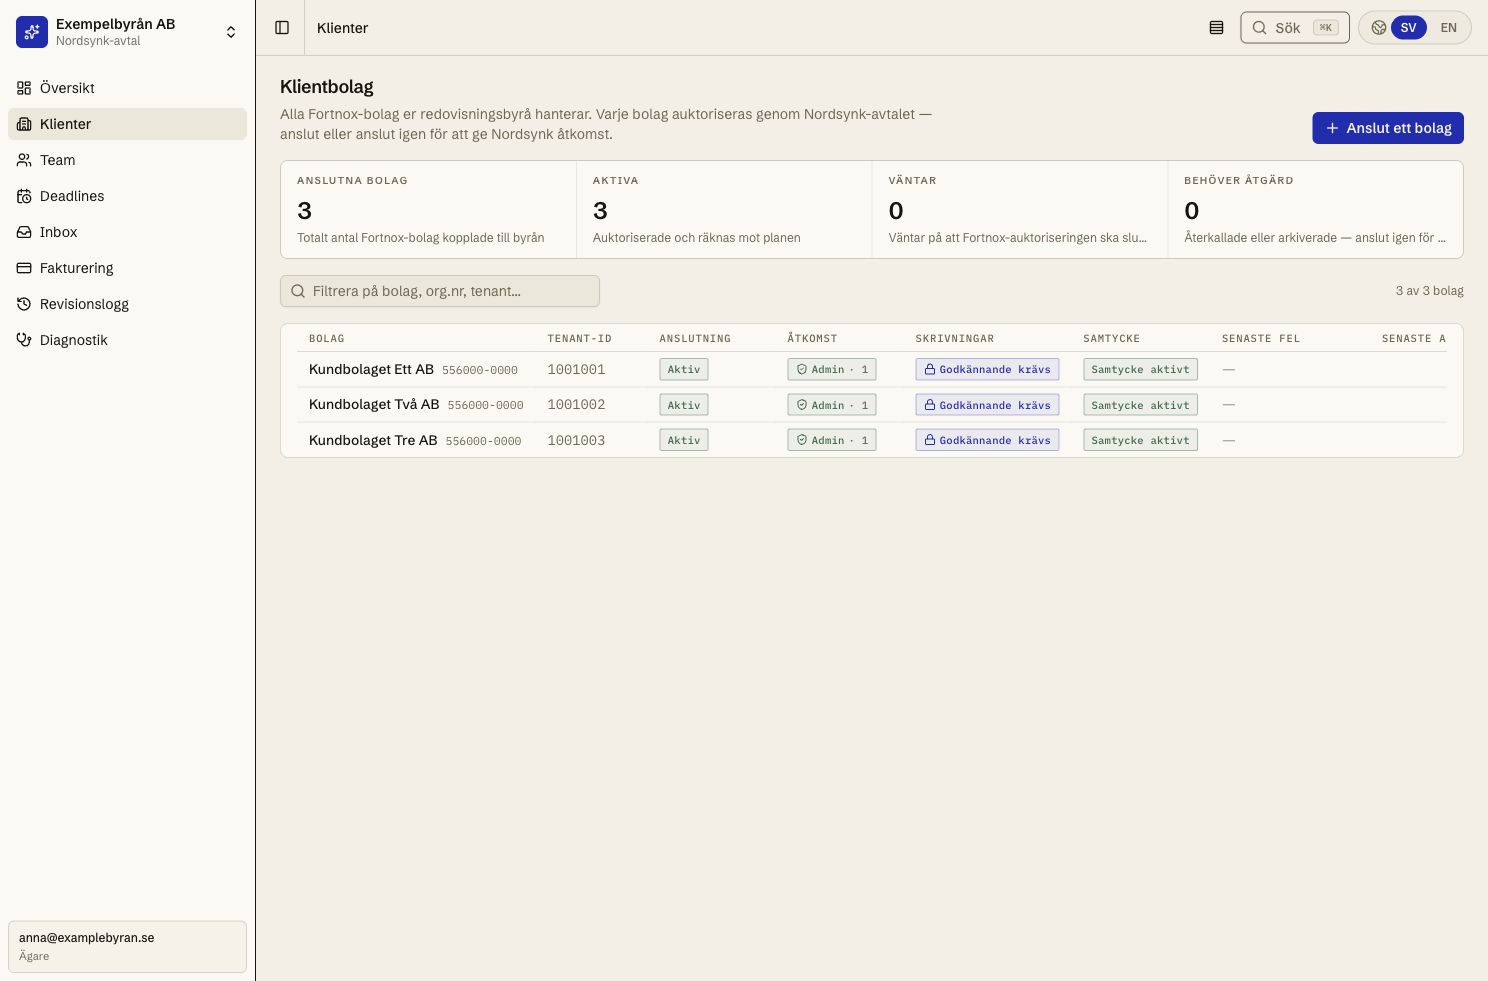
- 2.1Choose Connect first Fortnox company from the invitation. Fortnox may ask for normal sign-in or BankID. Select the company you intend to connect and approve Nordsynk.
- 2.2Next, open Clients in Nordsynk and choose Connect a company for each additional client. Repeat the Fortnox flow for every company.
- 2.3Every connection is stored for the real human Fortnox user and company. That user's product licences, company access, approval roles, and detailed permissions still apply.
If time reporting or personnel data is denied
Grant the connecting Fortnox user the right product and permission in that company, or connect with another real user who already has them. This is a Fortnox permission issue that Nordsynk cannot bypass.
Invite consultants and assign company access
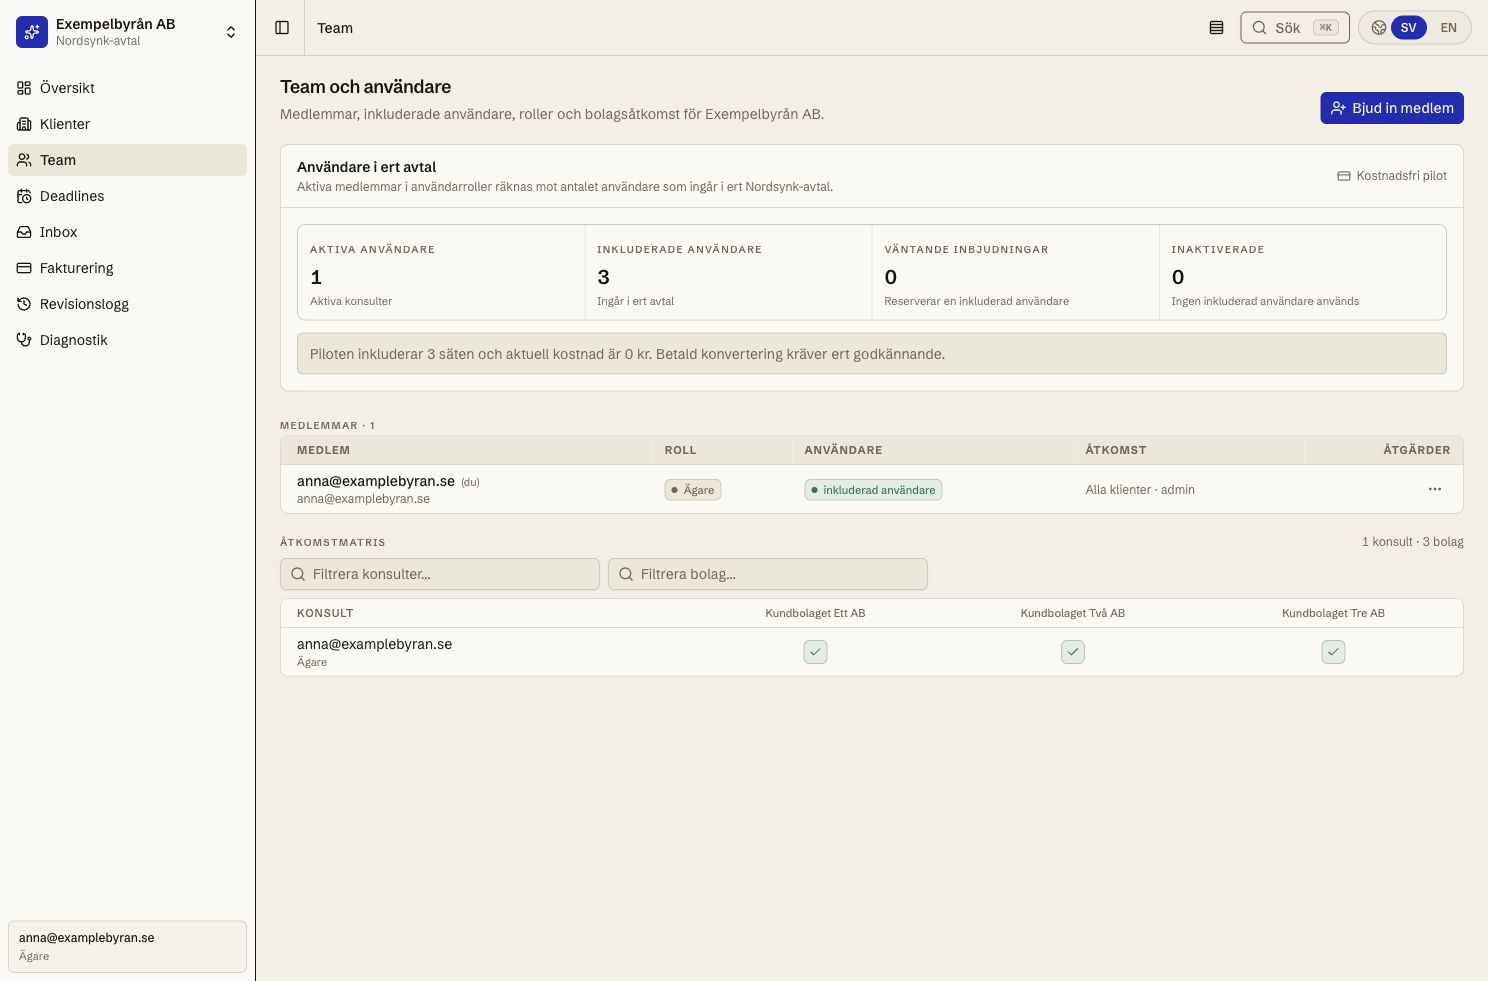
- 3.1Open Team and choose Invite member. Use the consultant's real work email, choose a role, and select the client companies they should see.
- 3.2The consultant accepts with exactly the same email. A pending invitation reserves an included user; a disabled member does not.
- 3.3Use the access matrix to grant all or selected client companies. The matrix controls Nordsynk access; Fortnox still has the final say over what the user can read or do.
- 3.4When a consultant must operate as their own Fortnox identity, they connect or reconnect the affected companies with their own human Fortnox user.
Add Nordsynk to Claude
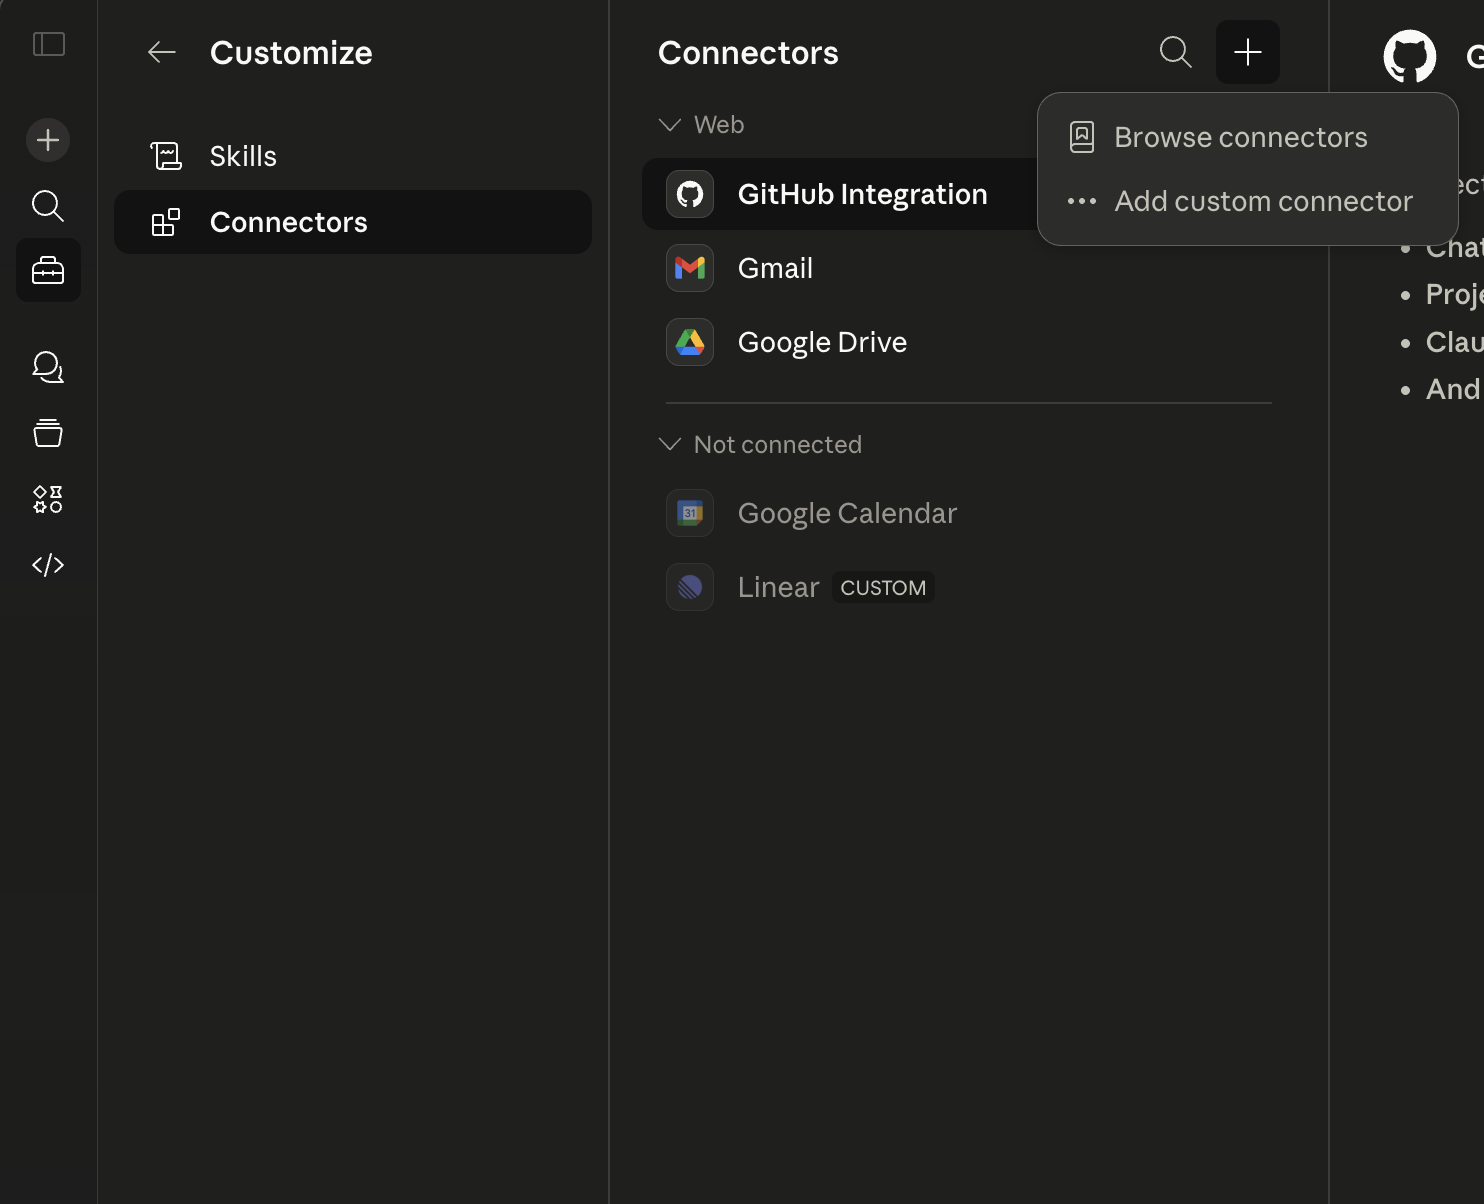
- 4.1In Claude, open Settings or Customize, choose Connectors, and then Add custom connector.
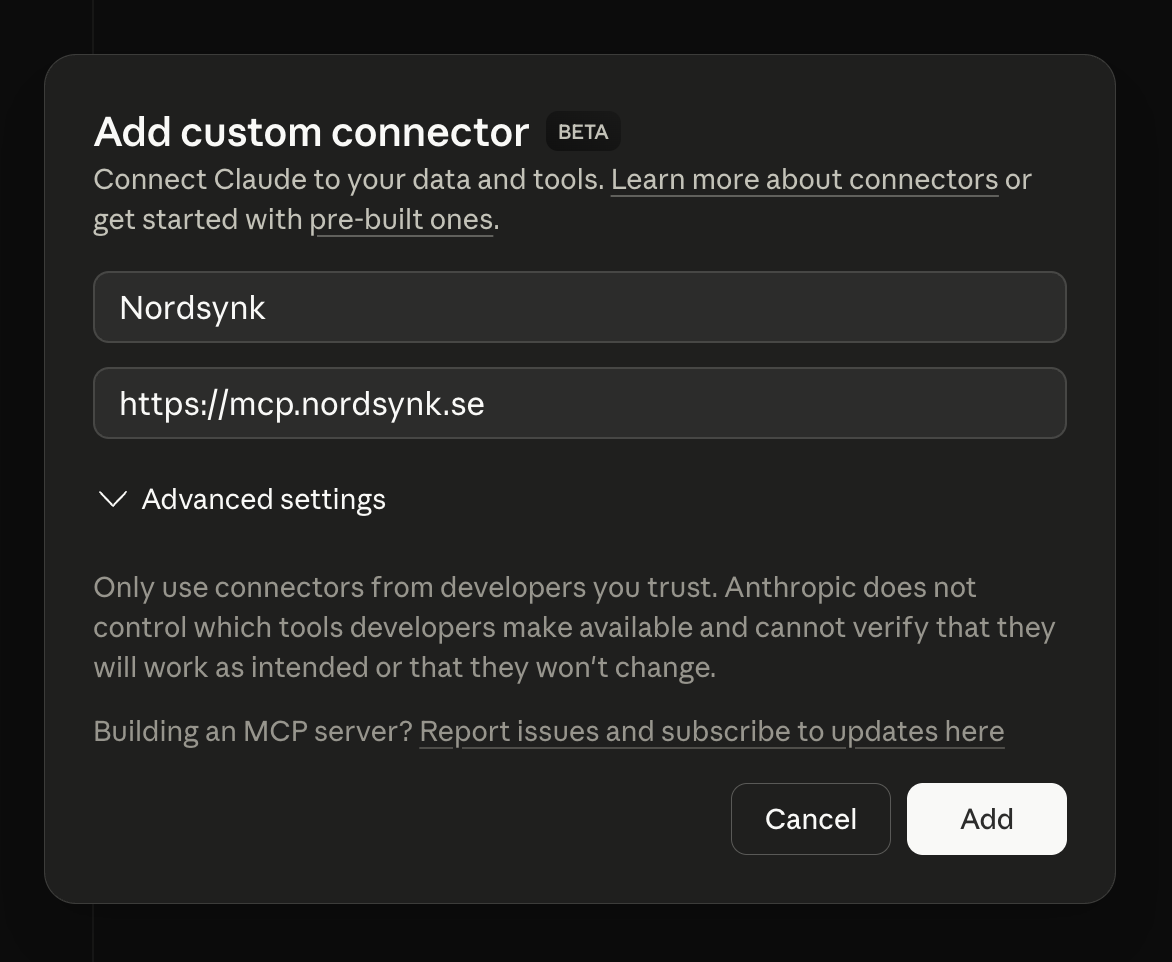
- 4.2Enter the name Nordsynk and the URL https://mcp.nordsynk.se. Do not add one connector per company—a personal Nordsynk connection can include several approved companies.
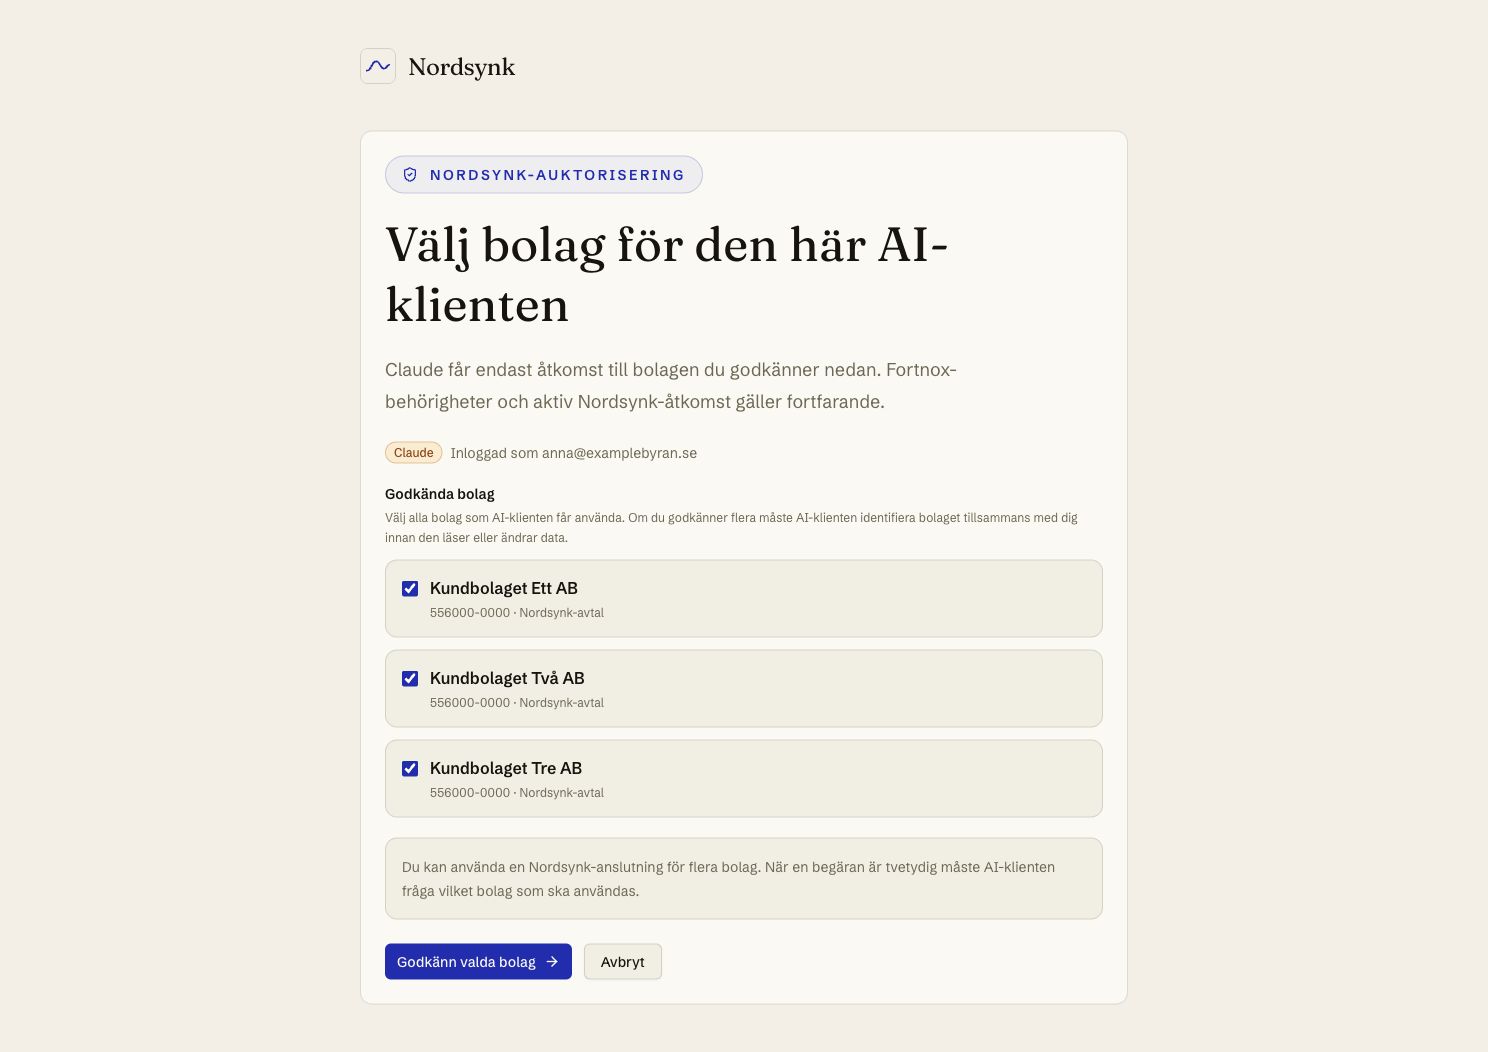
- 4.3Choose Connect or Add. Claude opens Nordsynk sign-in and company approval in your browser.
Approve exactly which companies Claude may use
- 5.1Sign in to Nordsynk with your personal email when Claude sends you there.
- 5.2Select one or more companies and choose Approve selected companies. This selection applies only to this AI client and can be changed by reconnecting it.
- 5.3Nordsynk has no hidden default company. When several companies are approved and the request is ambiguous, Claude must identify the company with you before reading or changing data.
Run a safe functional test
- 6.1Start with a read request that names the company, for example: Show unpaid customer invoices in Client Company One AB. Confirm Claude uses the right tenant and does not mix company data.
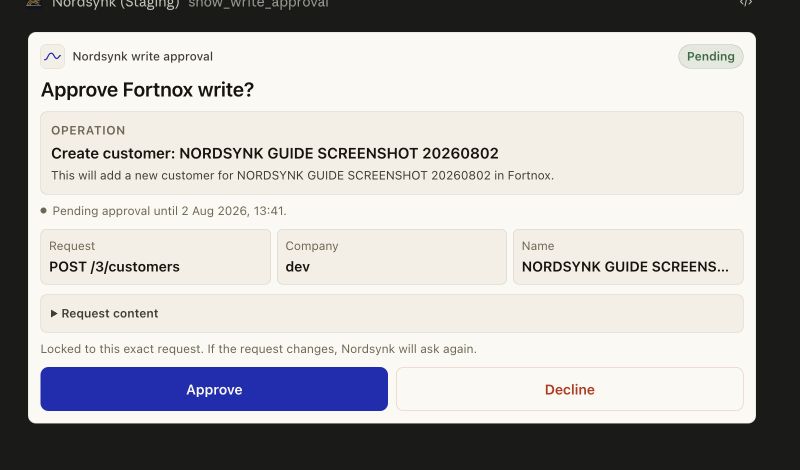
- 6.2Then try a harmless write request against test data. Nordsynk creates an approval containing the exact proposal; nothing is written to Fortnox until an authorised person approves it.
- 6.3Review company, amount, account, and date. Approve only when everything is correct; otherwise deny it and ask Claude for a new proposal.
Good first prompts in Claude
Always name the company when several are connected. Ask Claude to explain a change before you approve it.
- “Which customer invoices are overdue in Client Company One AB?”
- “Show the balance of account 2440 in Client Company Two AB as of 31 July 2026.”
- “Prepare a draft customer invoice in Client Company Three AB, but make no change without my approval.”
If something does not work
Keep the Claude connector connected and repair only the affected layer. Send the company name, user email, approximate time, and exact visible error to support if you need help.
Fortnox says the user lacks permission
Grant the human user the required Fortnox product, company access, approval role, or detailed permission, then retry.
One company needs reconnection
Open the affected company in Nordsynk and reconnect with the right Fortnox user. Do not remove the Claude connector; other companies remain available.
Claude does not ask which company you mean
Stop the action and name the company explicitly. Then review which companies were approved for the Claude connection.